安装Node.js
安装Git
安装Hexo
1 | //全局安装 |
存放位置
1 | C:\Users\libingshen\AppData\Roaming\npm\node_modules |
验证安装是否成功
1 | C:\Users\libingshen>node --version |
Hexo博客初始化
1 | $ cd D:\mytest\myhexo |
Hexo博客部署到GitHub
本地客户端与GitHub建立授权连接生成公私钥
1 | ssh-keygen -t rsa -C "782125244@qq.com" |
公私钥存放位置
1 | C:\Users\libingshen\.ssh |
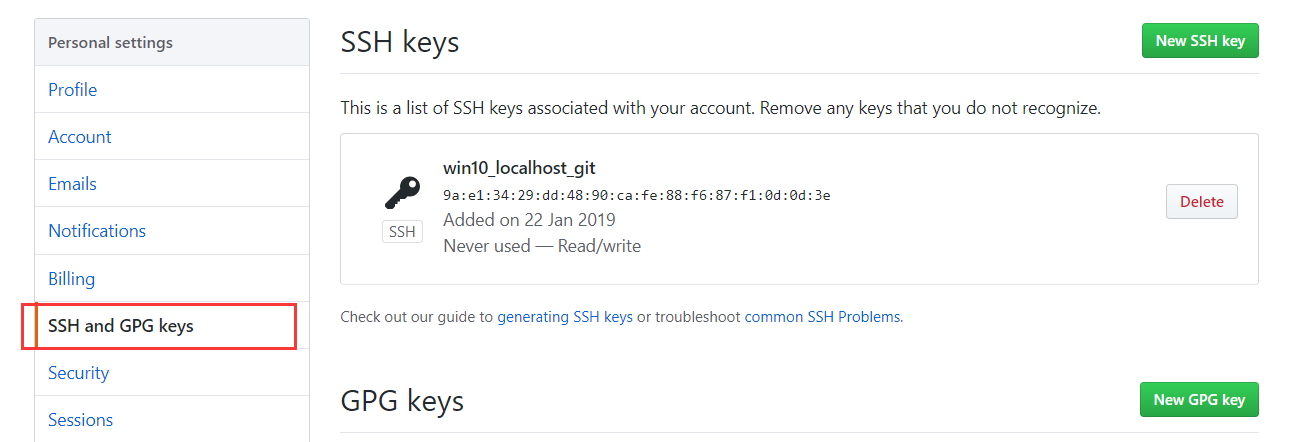
将公钥内容上传到GitHub
GitHub创建仓库作为hexo博客的站点
hexo配置GitHub连接
安装 hexo-deployer-git
1 | $ npm install hexo-deployer-git --save |
修改配置D:\mytest\myhexo_config.yml
1 | #配置GitHub博客站址访问路径 |
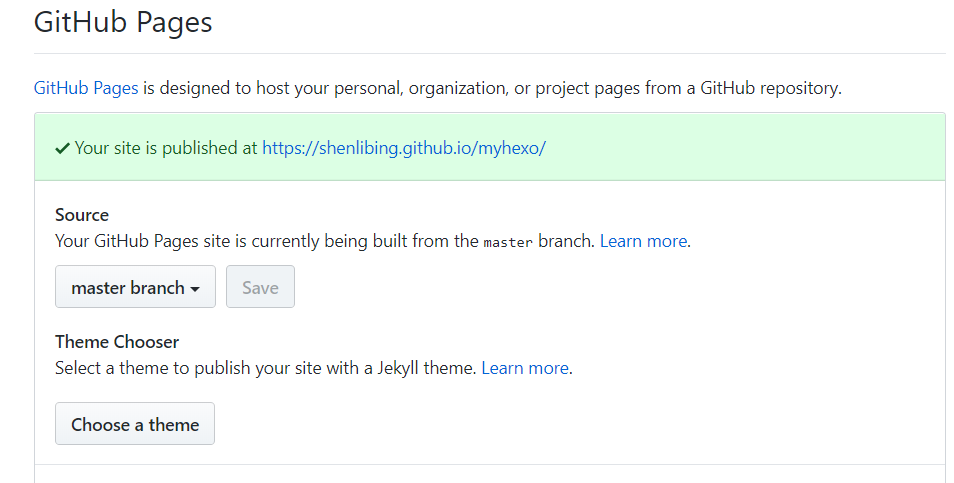
配置GitHub Pages
备份博客源文件
hexo部署到GitHub只上传.deploy_git文件夹的内容,并不会上传_posts文件夹下的博客源文件
1 | D:\mytest\myhexo\.deploy_git |
解决:
将_posts文件夹作为git仓库,上传到GitHub,使得其作为另一个分支
创建并切换到新分支
1 | libingshen@DESKTOP-7V287SK MINGW64 /d/mytest/myhexo/source/_posts (master) |
将新分支推送到GitHub
1 | git add . |
将博客源文件分支设为推送的默认分支,git push推送直接推送到src分支

补充:
删除本地分支
1 | $ git branch -d src |
删除远程分支
1 | $ git push origin -d src |
切换分支
1 | $ git checkout master |
查看提交日志
1 | $ git log --oneline |
拓展
更换hexo主题
下载
https://github.com/theme-next/hexo-theme-next
解压放到D:\mytest\myhexo\themes

修改D:\mytest\myhexo\_config.yml配置文件
1 | # Extensions |
修改站点语言
编辑D:\mytest\myhexo\_config.yml文件
1 | # Site |
开启搜索、字数统计和阅读时长统计
安装依赖hexo-symbols-count-time、hexo-generator-searchdb,安装依赖不成功时先删除D:\mytest\myhexo\node_modules文件夹,重新安装依赖
1 |
|
配置主题样式文件
进入D:\mytest\myhexo\themes\hexo-theme-next-master\文件夹,编辑_config.yml文件
1 | # Local search |
配置站点文件
编辑D:\mytest\myhexo\_config.yml文件
1 | #阅读时长和本文字数 |
添加分类和标签
1 | $ hexo new page categories |
编辑D:\mytest\myhexo\source\categories\index.md
1 |
|
编辑D:\mytest\myhexo\source\tags\index.md
1 |
|
修改菜单,添加categories和tags到menu中
1 | menu: |
新增文章,添加categories、tags
1 |
|
更换页面菜单布局位置
1 | # Schemes |
配置文章浏览量
注册
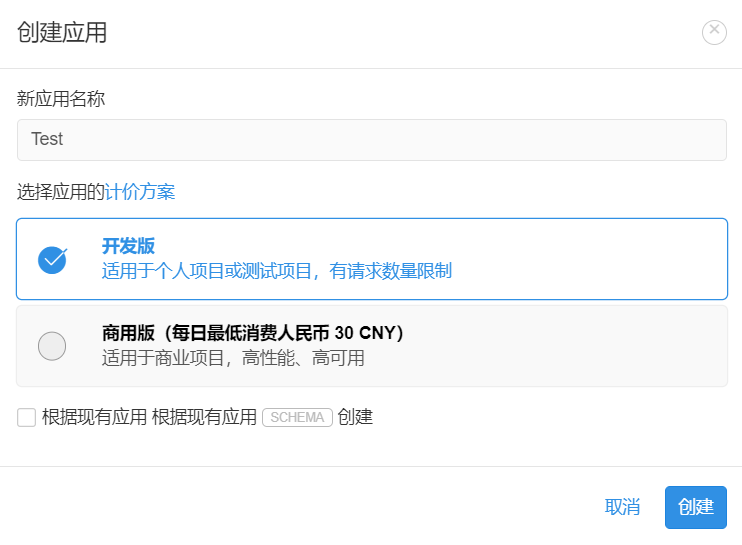
创建应用
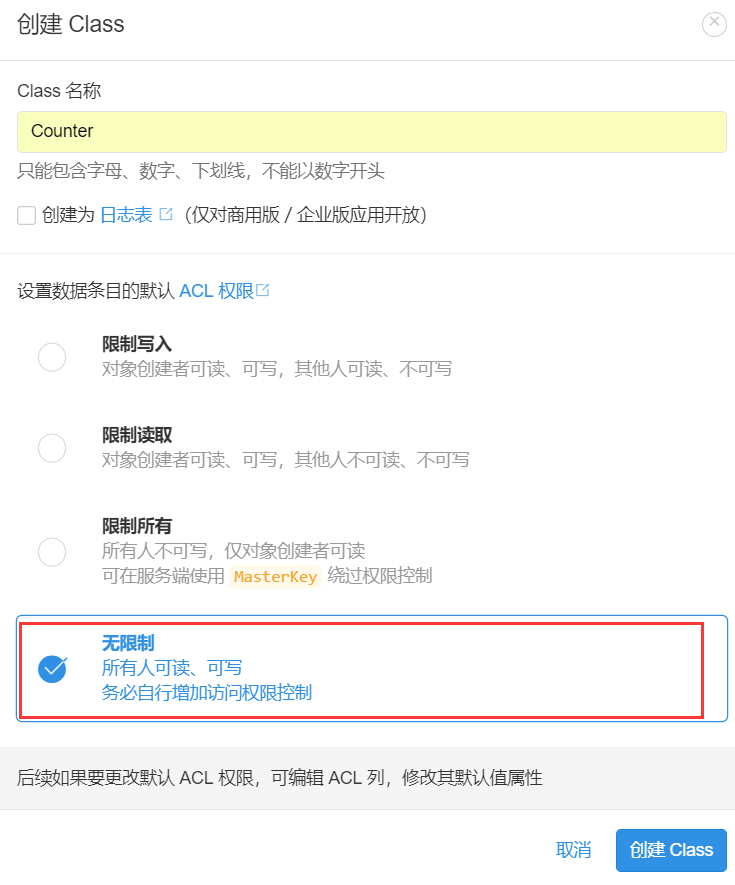
创建Class
配置web安全域名
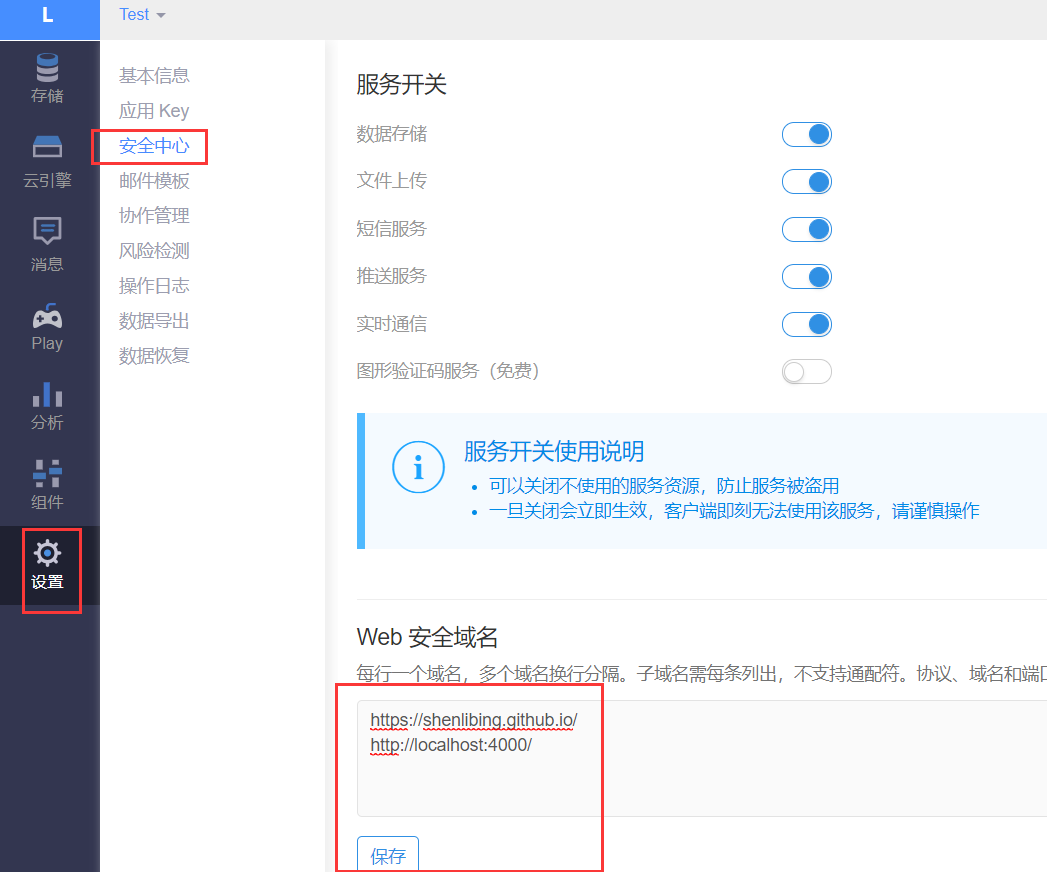
获取app_id、app_key
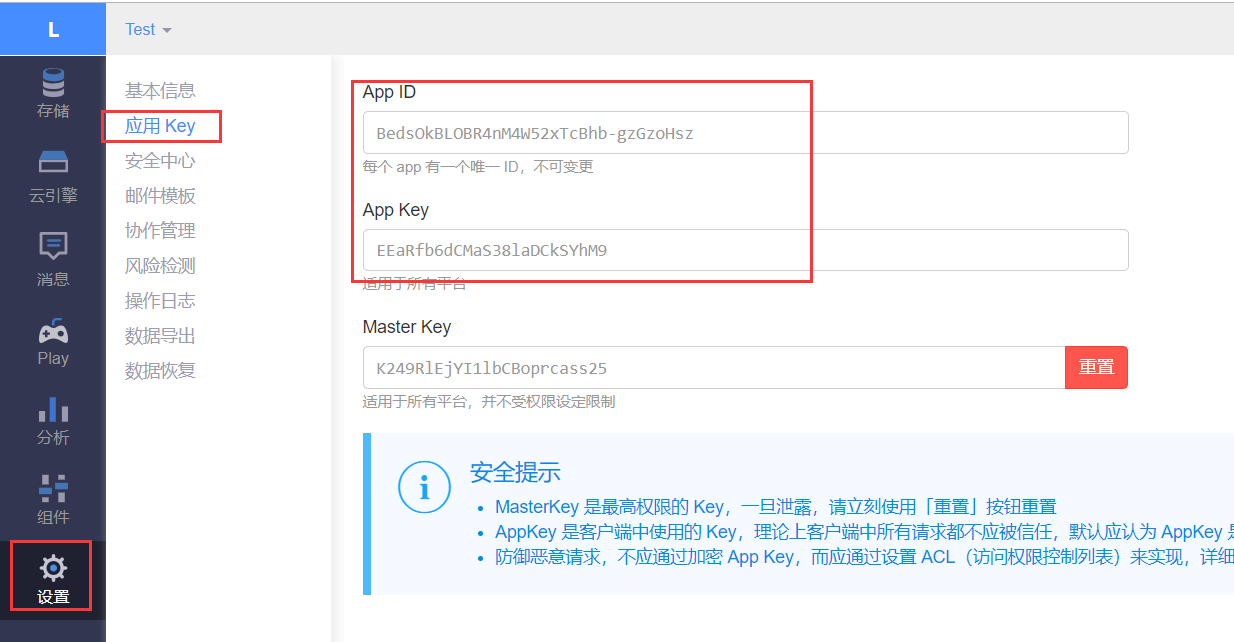
编辑D:\mytest\myhexo\themes\hexo-theme-next-master\_config.yml配置文件,填app_id、
app_key;security设置为false
1 |
|
插入本地图片
安装依赖
1 | npm install hexo-asset-image --save |
编辑D:\mytest\myhexo\_config.yml配置文件
1 | post_asset_folder: true |
命令hexo new post test来生成博文时,/source/_post文件夹中除了test.md外,还有一个同名test文件夹
typora插入本地图片
typora设置
文件–偏好设置–图片插入
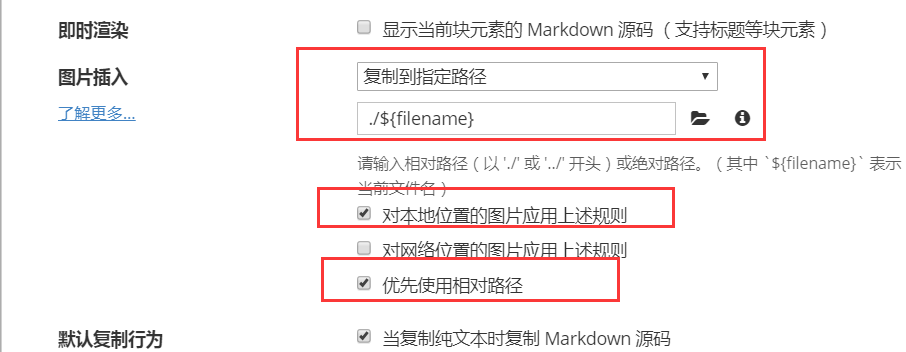
编辑–图片工具–设置图片根目录
1 | typora-root-url: hexo/ |
设置动态背景
进入D:\mytest\myhexo\themes\hexo-theme-next-master\layout\文件夹,编辑_layout.swig文件,在</body>之前添加
1 | <script type="text/javascript" src="//cdn.bootcss.com/canvas-nest.js/1.0.0/canvas-nest.min.js"></script> |
添加Fork me on GitHub
进入D:\mytest\myhexo\themes\hexo-theme-next-master\layout\文件夹,编辑_layout.swig文件,在<div class="headband"></div>下面添加选择的图标样式代码
1 | <a href="https://github.com/shenlibing/" class="github-corner" aria-label="View source on GitHub"><svg width="80" height="80" viewBox="0 0 250 250" style="fill:#151513; color:#fff; position: absolute; top: 0; border: 0; right: 0;" aria-hidden="true"><path d="M0,0 L115,115 L130,115 L142,142 L250,250 L250,0 Z"></path><path d="M128.3,109.0 C113.8,99.7 119.0,89.6 119.0,89.6 C122.0,82.7 120.5,78.6 120.5,78.6 C119.2,72.0 123.4,76.3 123.4,76.3 C127.3,80.9 125.5,87.3 125.5,87.3 C122.9,97.6 130.6,101.9 134.4,103.2" fill="currentColor" style="transform-origin: 130px 106px;" class="octo-arm"></path><path d="M115.0,115.0 C114.9,115.1 118.7,116.5 119.8,115.4 L133.7,101.6 C136.9,99.2 139.9,98.4 142.2,98.6 C133.8,88.0 127.5,74.4 143.8,58.0 C148.5,53.4 154.0,51.2 159.7,51.0 C160.3,49.4 163.2,43.6 171.4,40.1 C171.4,40.1 176.1,42.5 178.8,56.2 C183.1,58.6 187.2,61.8 190.9,65.4 C194.5,69.0 197.7,73.2 200.1,77.6 C213.8,80.2 216.3,84.9 216.3,84.9 C212.7,93.1 206.9,96.0 205.4,96.6 C205.1,102.4 203.0,107.8 198.3,112.5 C181.9,128.9 168.3,122.5 157.7,114.1 C157.9,116.9 156.7,120.9 152.7,124.9 L141.0,136.5 C139.8,137.7 141.6,141.9 141.8,141.8 Z" fill="currentColor" class="octo-body"></path></svg></a><style>.github-corner:hover .octo-arm{animation:octocat-wave 560ms ease-in-out}@keyframes octocat-wave{0%,100%{transform:rotate(0)}20%,60%{transform:rotate(-25deg)}40%,80%{transform:rotate(10deg)}}@media (max-width:500px){.github-corner:hover .octo-arm{animation:none}.github-corner .octo-arm{animation:octocat-wave 560ms ease-in-out}}</style> |
添加友情链接
方式一
进入D:\mytest\myhexo\themes\hexo-theme-next-master\layout\_partials文件夹,在footer.swig文件末尾追加
1 | <div>友情链接: |
方式二
进入D:\mytest\myhexo\themes\hexo-theme-next-master文件夹,编辑_config.yml文件
1 | # Blog rolls |
设置阅读全文
进入D:\mytest\myhexo\themes\hexo-theme-next-master文件夹,编辑_config.yml文件
1 | # Automatically Excerpt. Not recommend. |
添加评论
选择gitalk
需要 GitHub Application,如果没有 点击这里申请,Authorization callback URL 填写当前使用插件页面的域名。
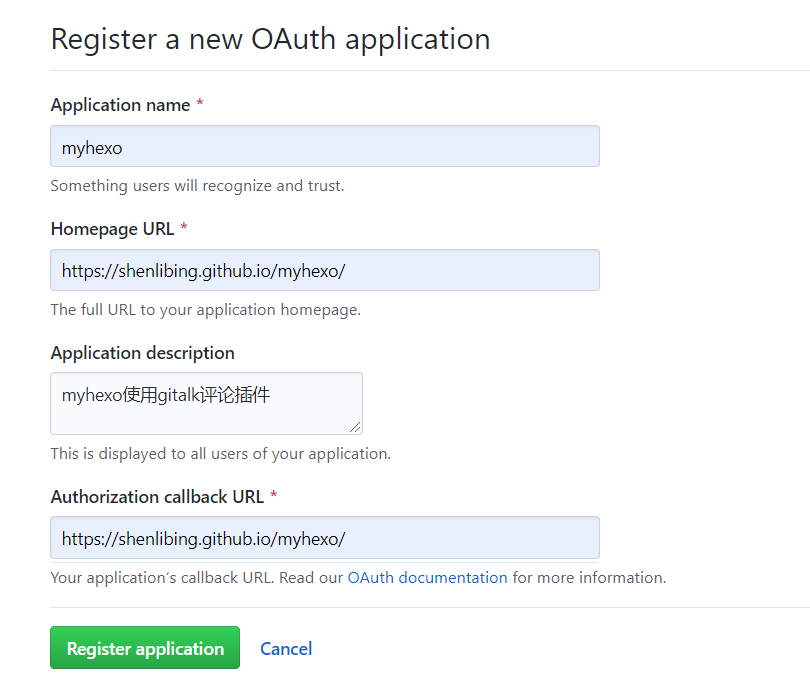
获取client_id和client_secret

进入D:\mytest\myhexo文件夹,编辑_config.yml文件
clientID
StringRequired. GitHub Application Client ID.
clientSecret
StringRequired. GitHub Application Client Secret.
repo
StringRequired. GitHub repository.
owner
StringRequired. GitHub repository owner. Can be personal user or organization.
admin
ArrayRequired. GitHub repository owner and collaborators. (Users who having write access to this repository)
1 | # Gitalk |
开启打赏
进入D:\mytest\myhexo文件夹,编辑_config.yml文件
1 | # Reward |
部署到云服务器
拷贝本机的公钥id_rsa.pub内容到云服务器authorized_keys上


进入D:\mytest\myhexo文件夹,编辑_config.yml文件
1 | # URL |
服务器创建裸仓库
1 | [root@izm5eac6bnsz8uq175jkvez project]# git init --bare hexo.git |
配置钩子
1 | [root@izm5eac6bnsz8uq175jkvez hooks]# pwd |
修改Nginx配置文件
1 | [root@izm5eac6bnsz8uq175jkvez blog]# whereis nginx |
使用GitHub图床
创建个存放图片的仓库blogphoto
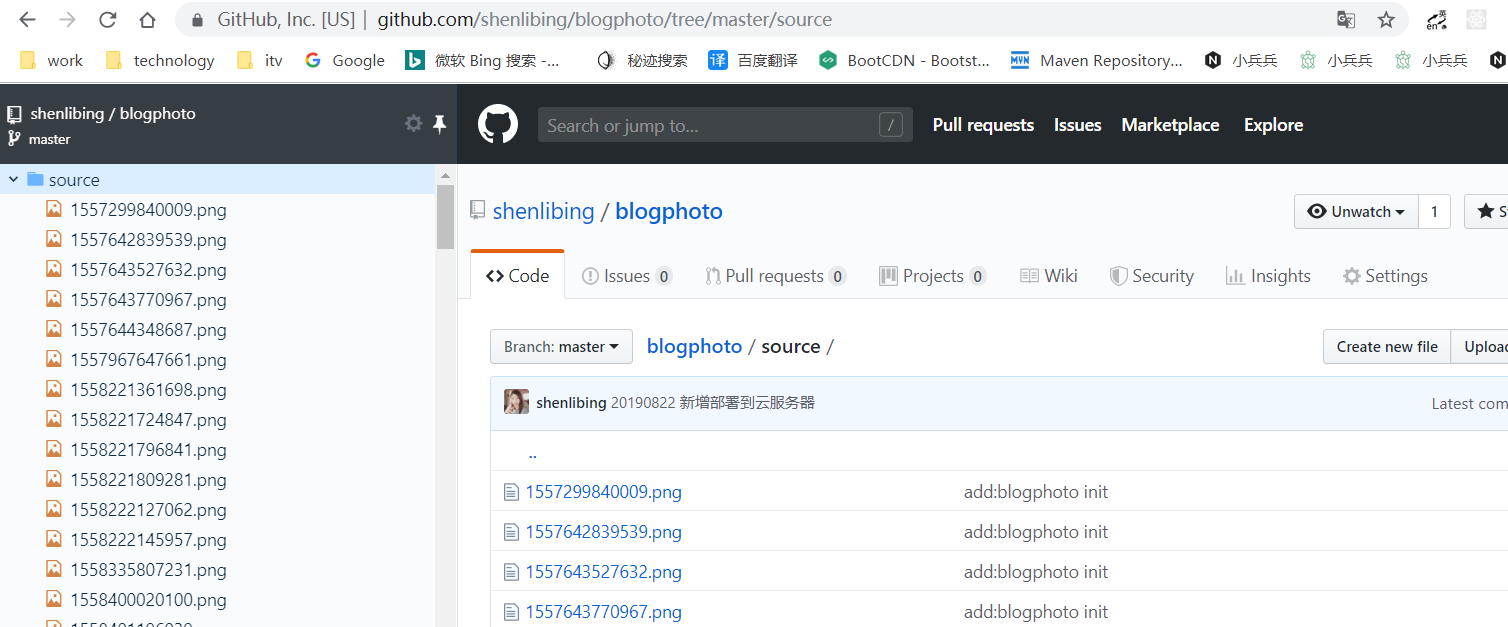
替换typora生成的图片路径
替换脚本

使用七牛云图床
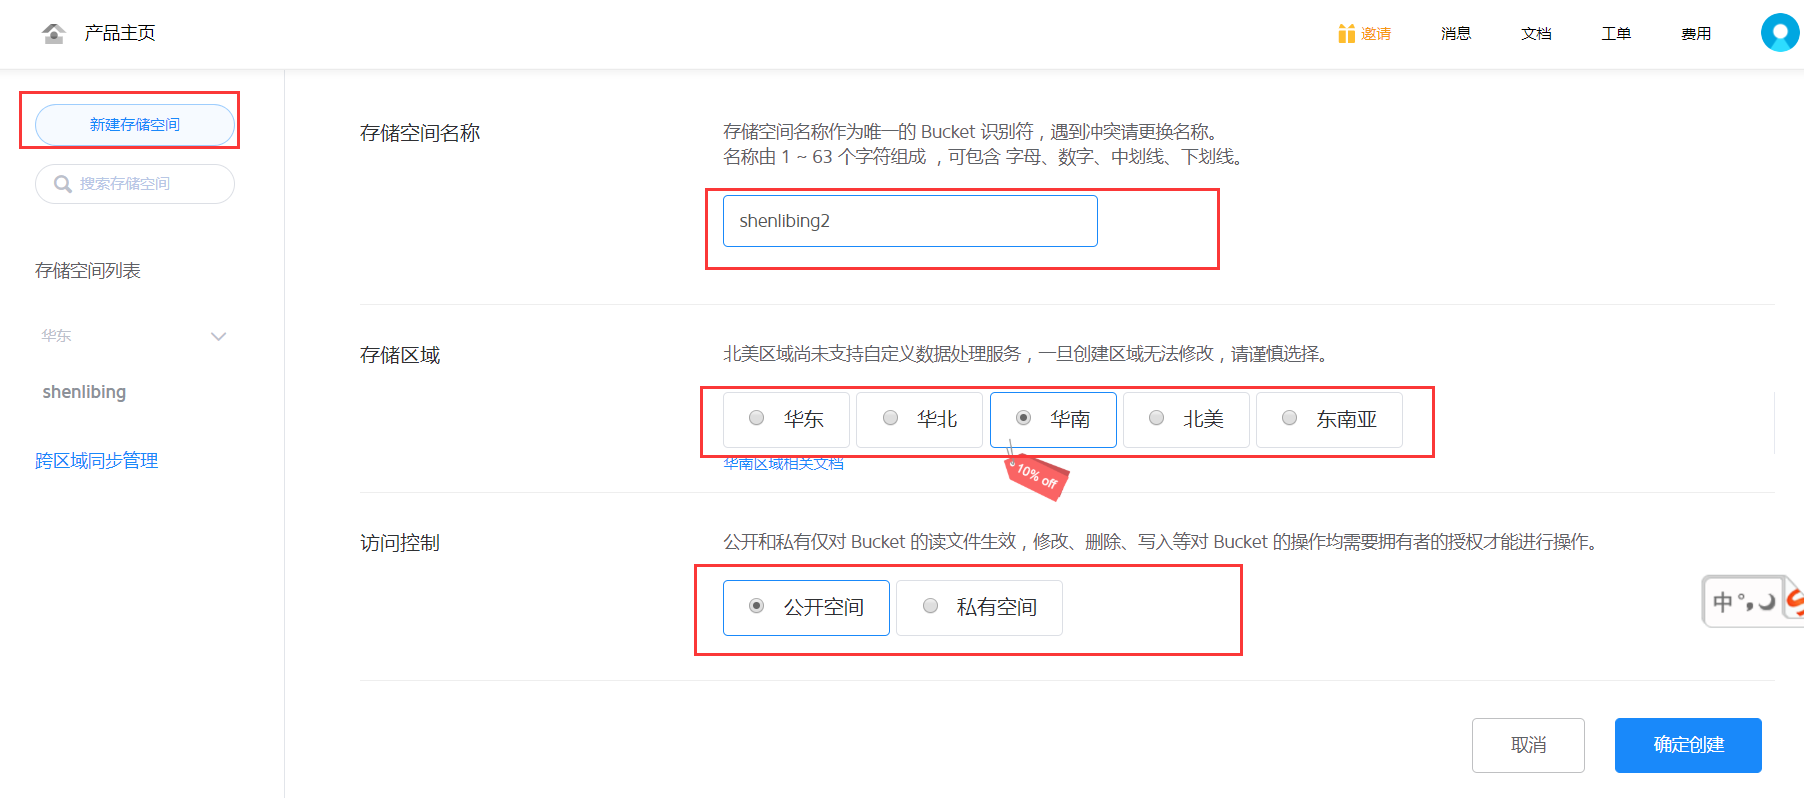
新建存储空间
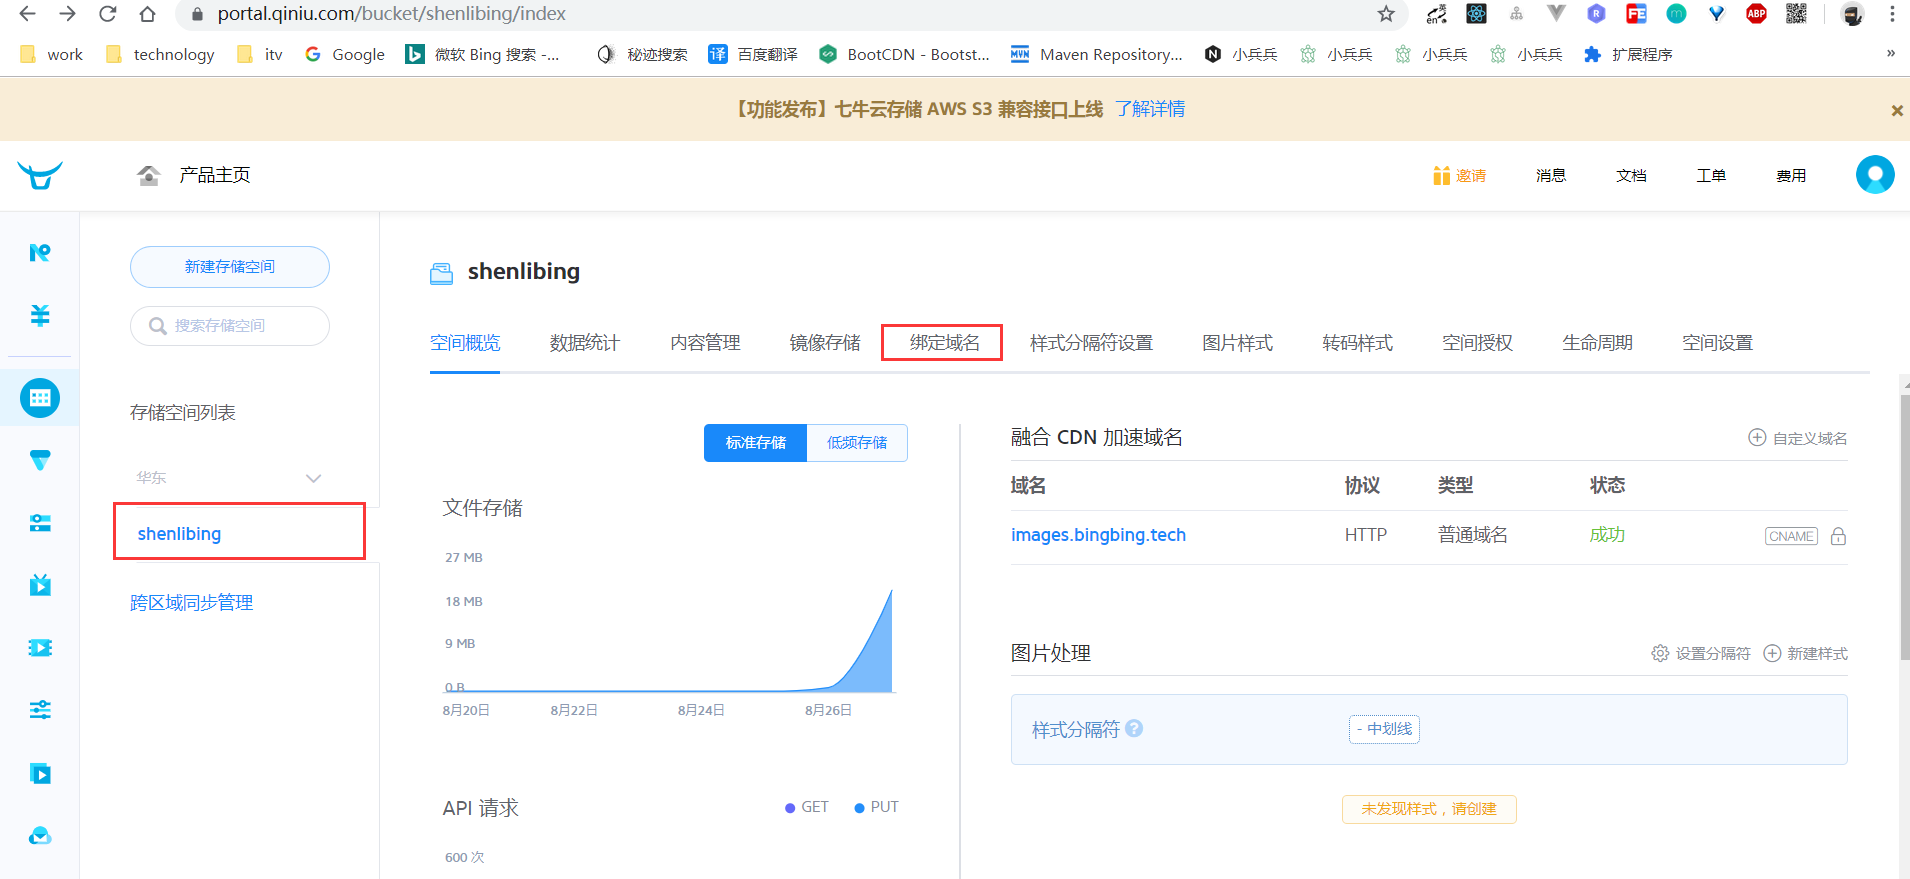
绑定域名

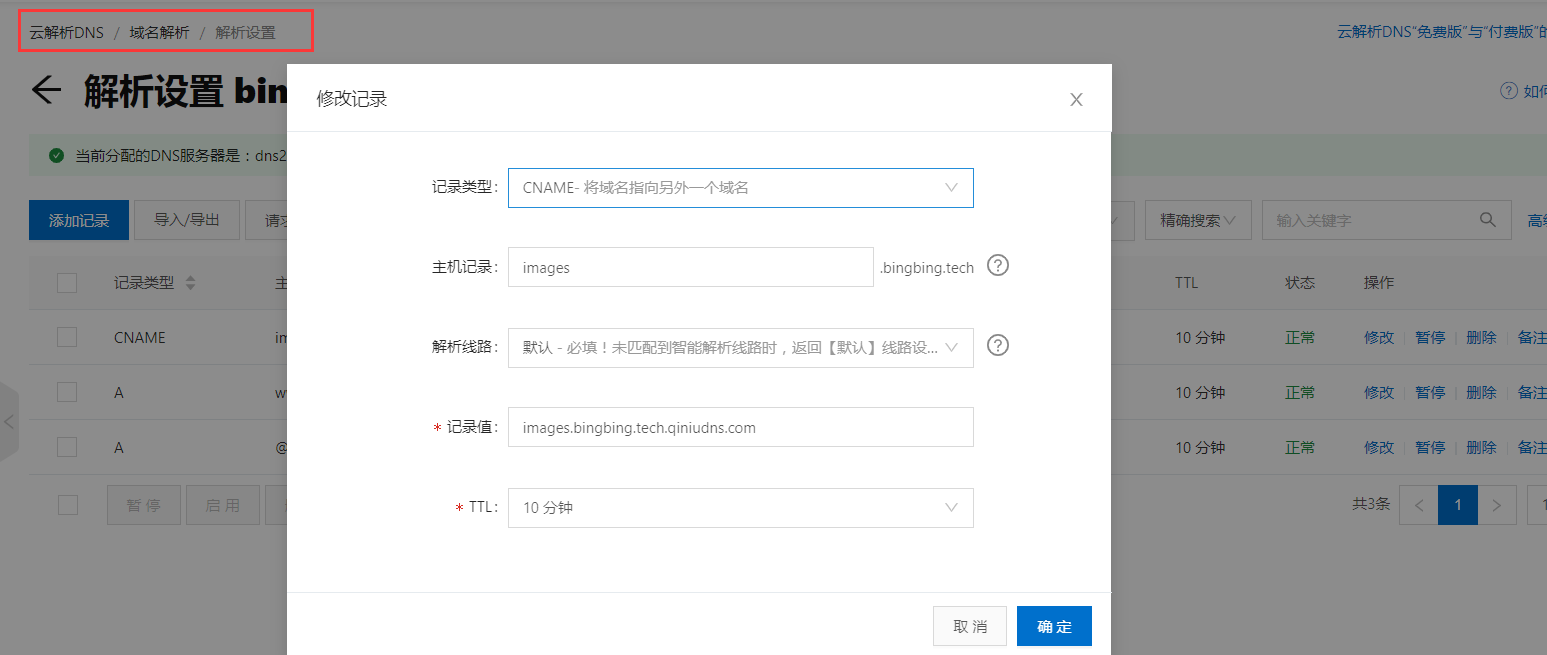
域名添加CANME记录
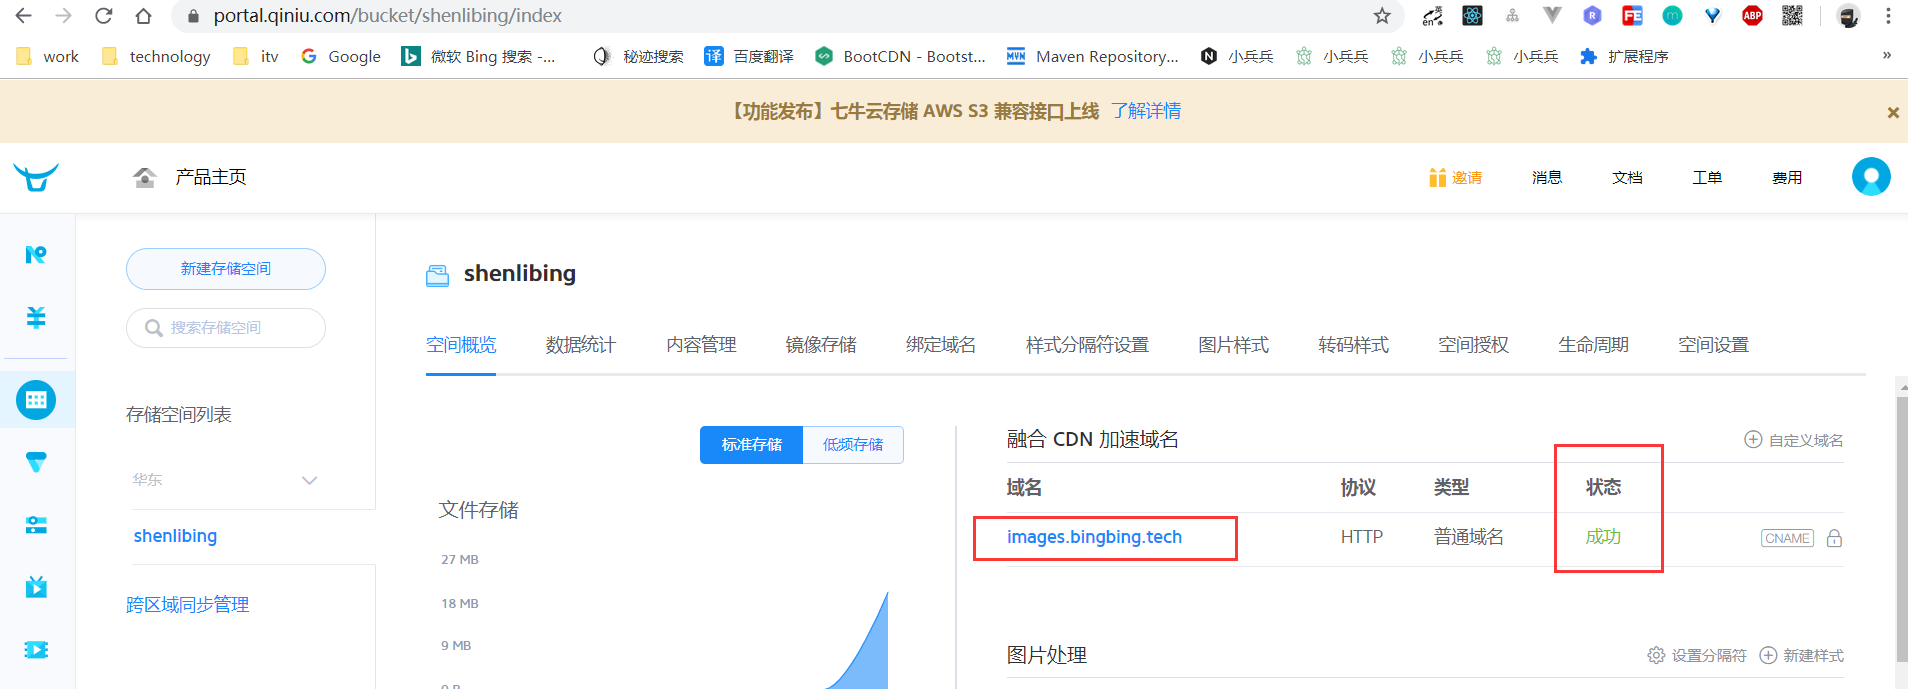
上传图片、外链访问
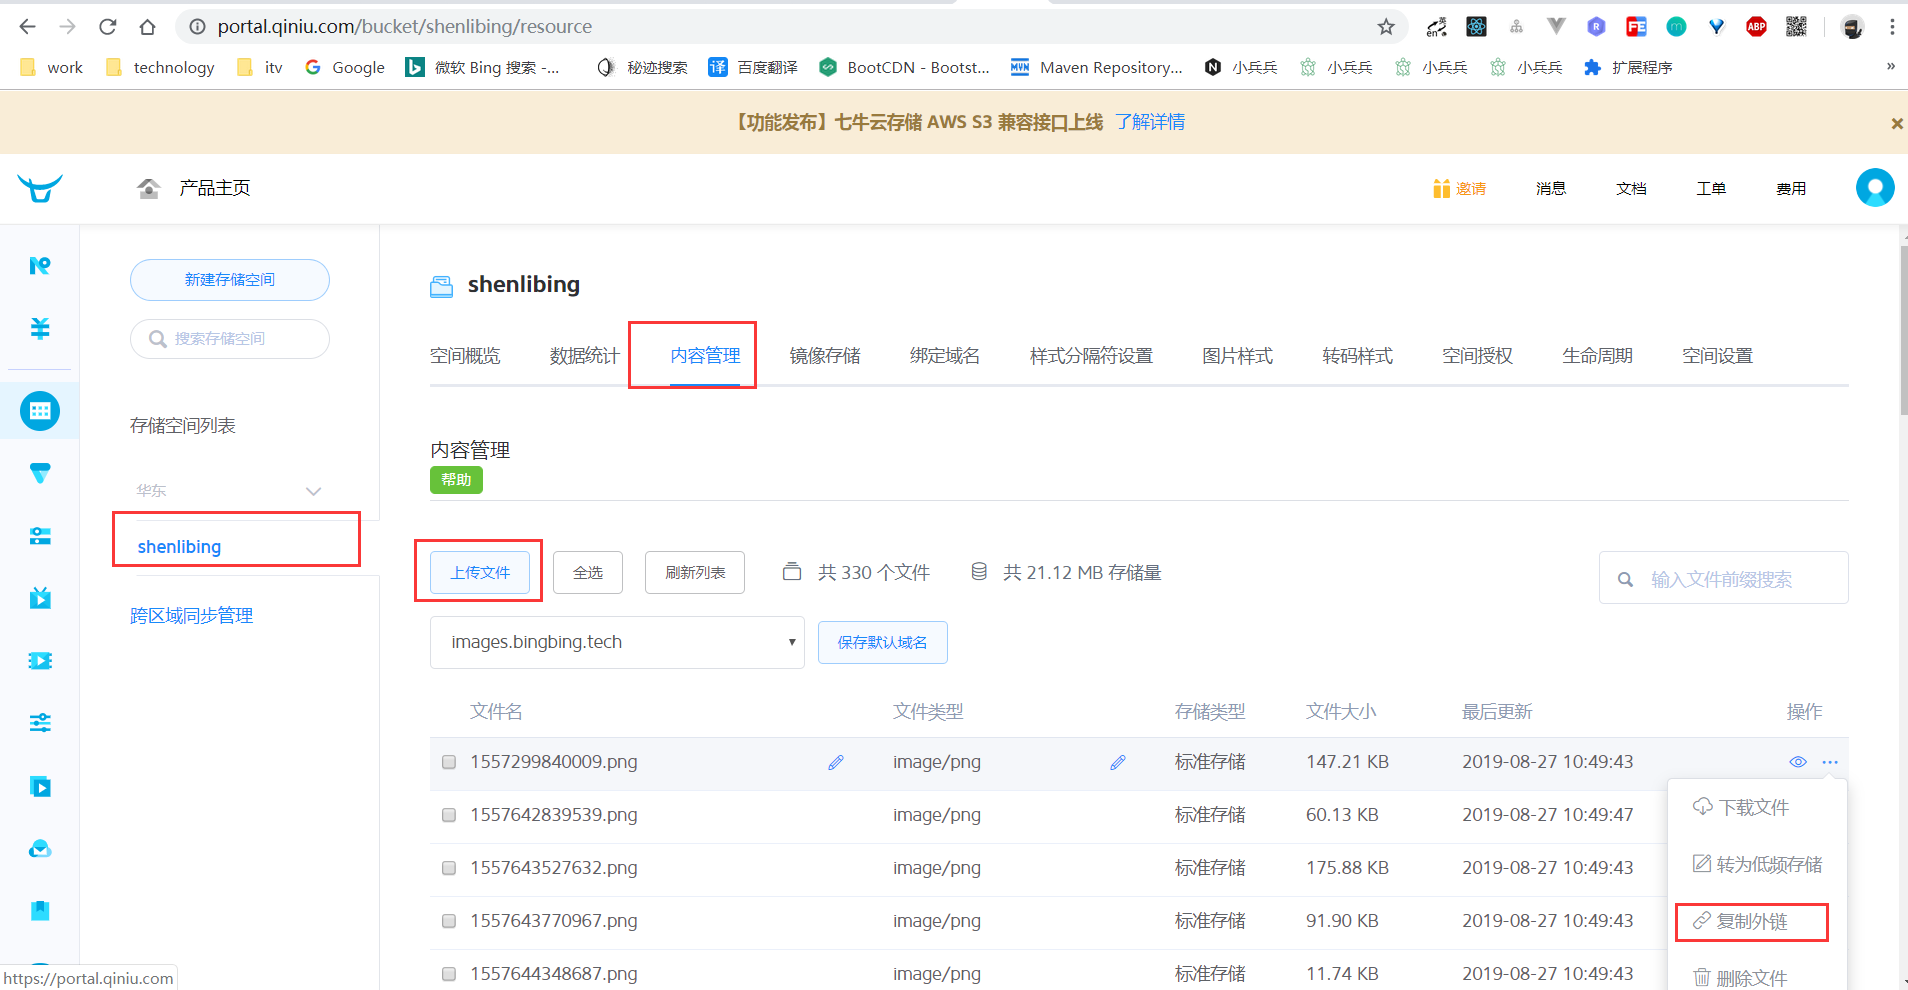
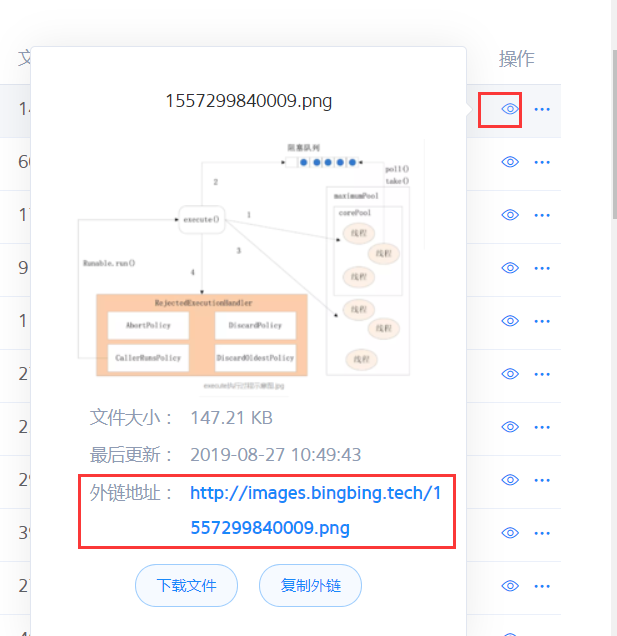
替换脚本

优化URL
安装依赖
1 | npm install hexo-abbrlink --save |
编辑D:\mytest\myhexo\_config.yml配置文件
1 | # URL |
常见错误
错误一:
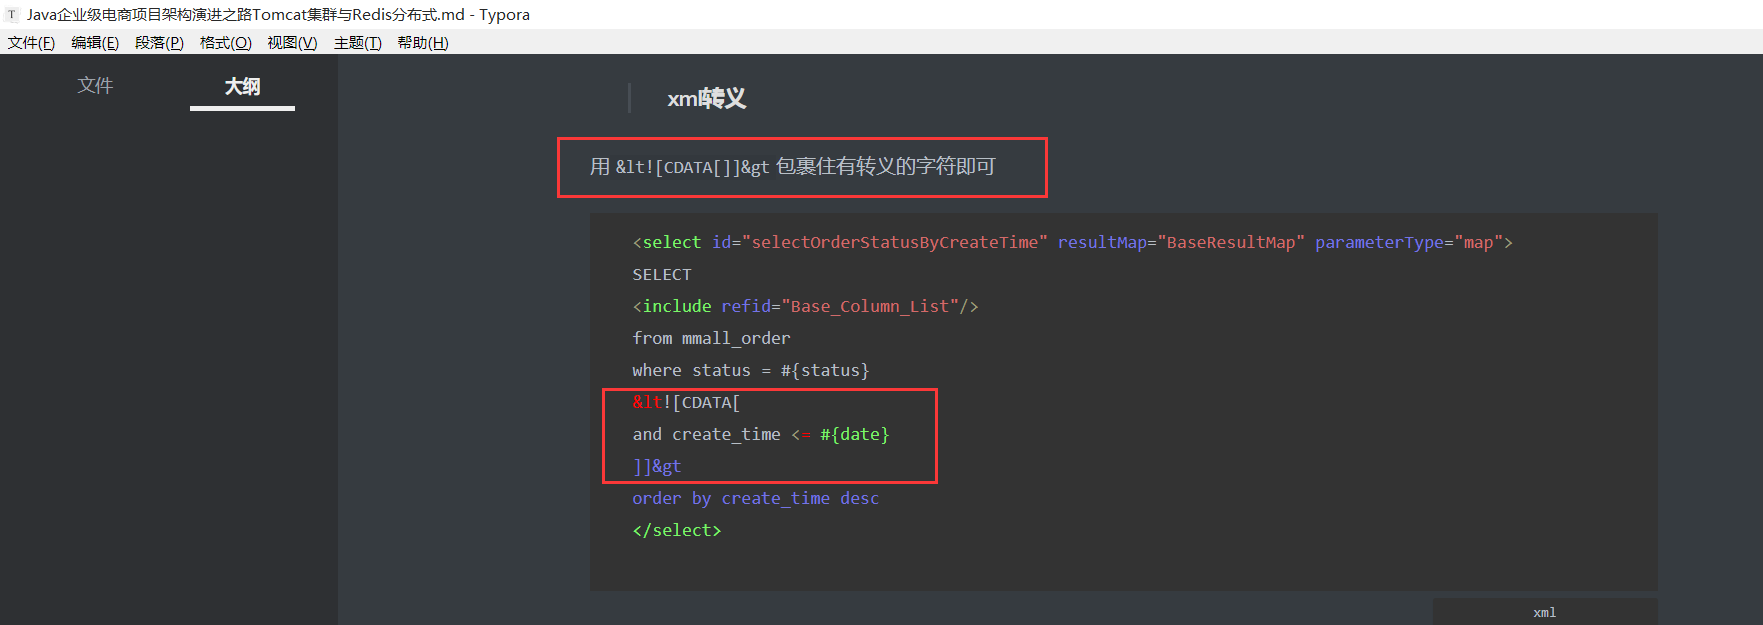
故障现象:xml转移错误,导致搜索不出结果

故障原因:
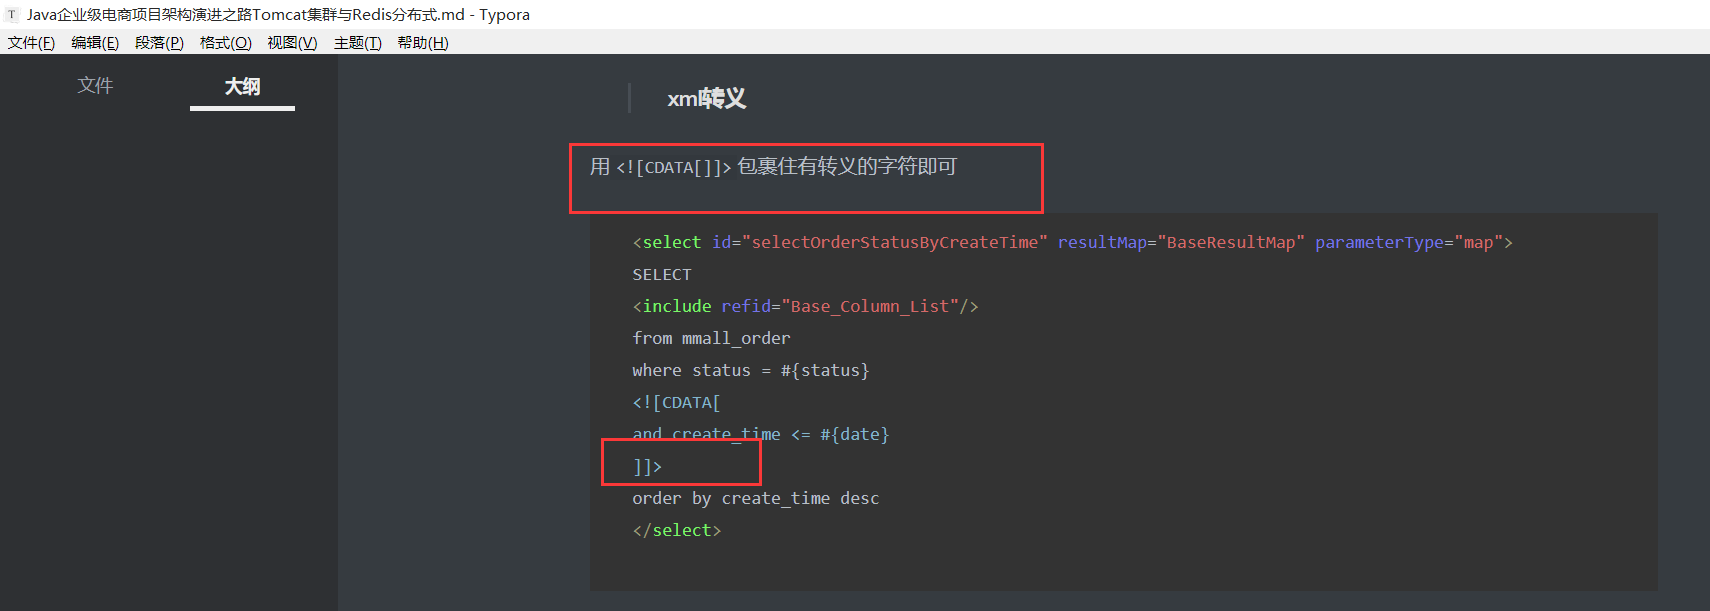
解决:
参考:
【持续更新】Github Pages + Hexo 博客搭建,Next主题个性化修改

